Illustration 1
Here you can download the freeware-program 7WCopy.
7WCopy is useful to make backup images from your floppy disks and save them to your harddrive or a network-drive.
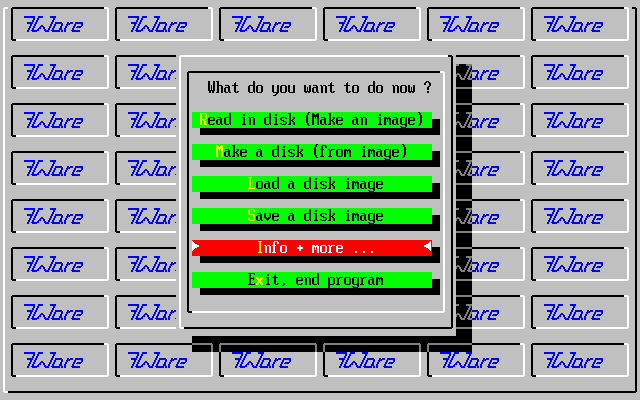
The screenshot below shows the main menue of 7WCopy.
Before demonstrate on how to generate disk images, save them, load them and
overwrite a disk I want to show first, how to adjust important settings of 7WCopy.
So first we go with the cursorkey DOWN to the point "Info + more ...", as shown in Illustration 1.

Illustration 1
Then we press ENTER.
In Illustration 2 we see, that 7WCopy shows important settings. The most important setting might be, on which drive in which folder 7WCopy saves or loads the imagefiles. Default is drive and folder, from which 7WCopy was startet.
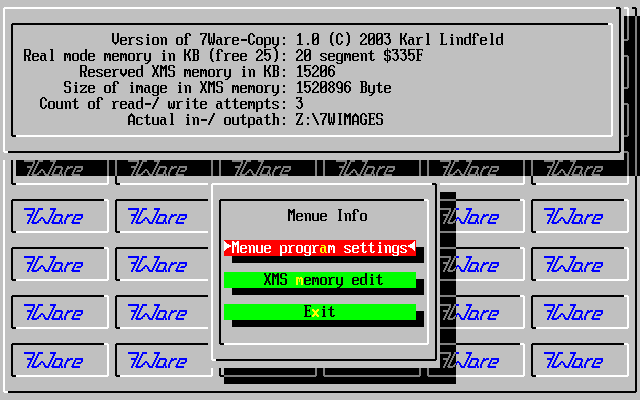
Illustration 2
To adjust another drive and/or folder as the one which is shown, we go to the "Menue program settings", as shown in Illustration 2.
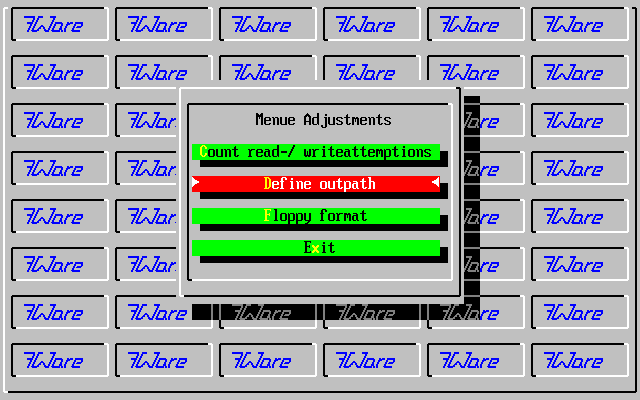
Illustration 3
Then we choose the menuepoint "Define outpath" with pressing the key ENTER (Illustration 3).
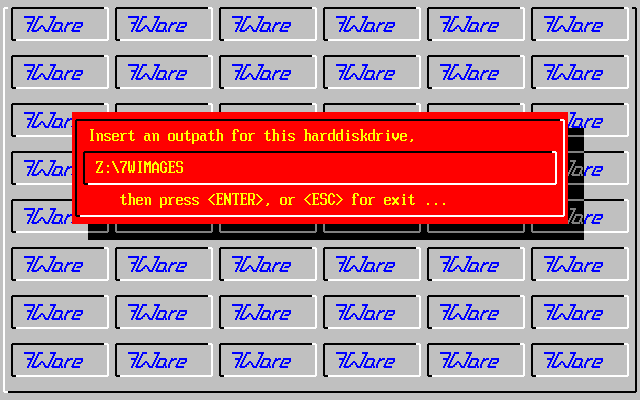
Illustration 4
You see a red inputmask with drive and path to your diskimages (Illustration 4). Here you can enter another, also not existing path or you can choose comfortably drive and path. Therefor you erase the entry with the SPACE-Key and then press ENTER. The program jumps back to the "Menue program settings". Now we choose oncemore the menuepoint "Define outpath". On the screen appears following dialog-box, as shown in Illustration 5 ...
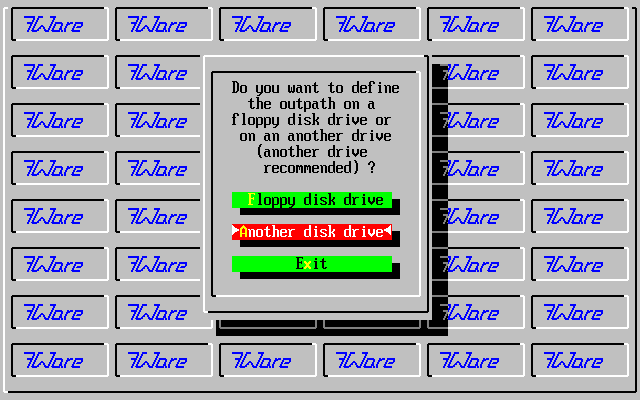
Illustration 5
We choose "Another disk drive". On the screen appears a listbox with all harddrives and LAN-drives of your system, as shown in Illustration 6 ...
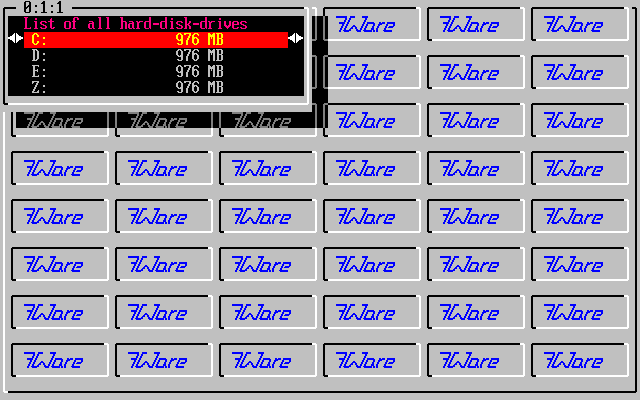
Illustration 6
We want to define the same outpath as before, so we choose drive Z: (with cursorkey DOWN and ENTER).
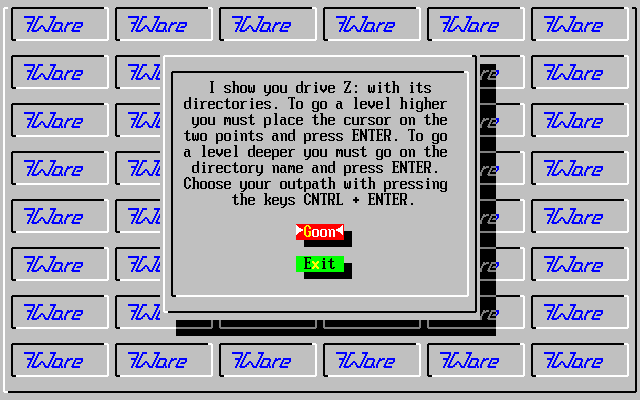
Illustration 7
On the screen appears a dialog-box with a helptext, as shown in Illustration 7. We choose "Goon".
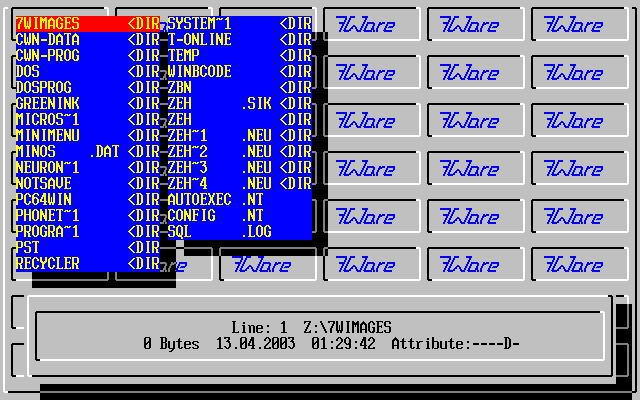
Illustration 8
The program shows the root of drive Z:. To enter the folder "7WIMAGES", we must change to this folder. So we put the red cursorbar on the folder (as shown in Illustration 8) and then press ENTER. Now we see the content of this folder, but only 7WI-Files are shown (like in Illustration 9).
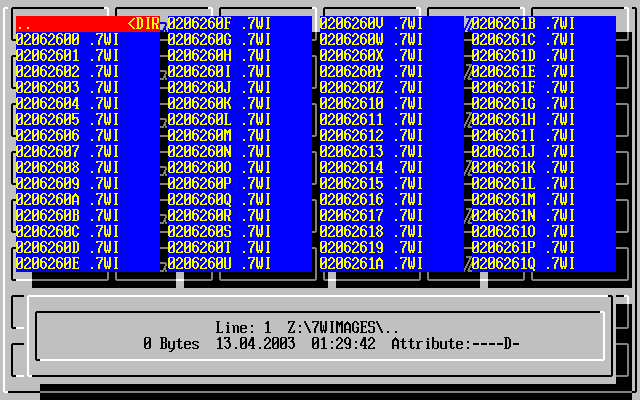
Illustration 9
Now we press the keyshortcut CNTRL and ENTER.
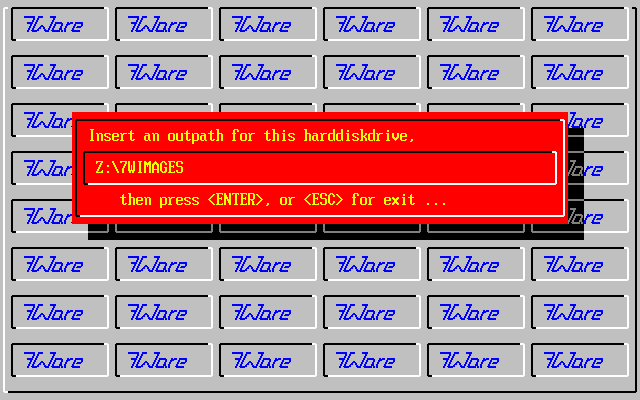
Illustration 10
As you see in Illustration 10 7WCopy entered drive and folder to the inputmask. We press ENTER to take over this setting.
After defining the outpath of 7WCopy (where it saves and loads diskimages),
I want to show you the other functions of 7WCopy. Therefor we change from the
"Menue program settings" to the mainmenue with the ESC-Key. As shown in
Illustration 11, the red cursorbar marks the
menuepoint "Read in disk (Make an image)".
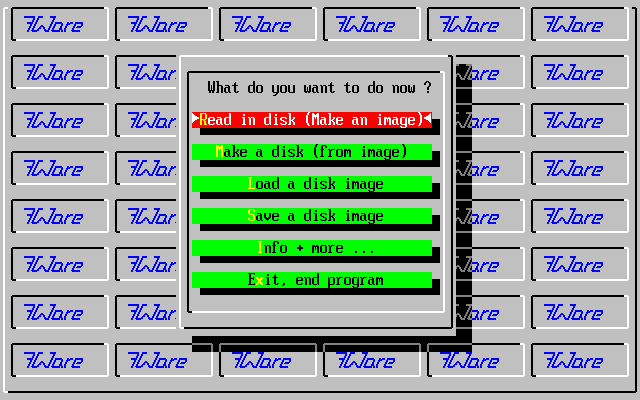
Illustration 11
We take over this menuepoint with ENTER. On the screen appears a listbox with all your floppydrives (Illustration 12). We insert a disk in drive A:
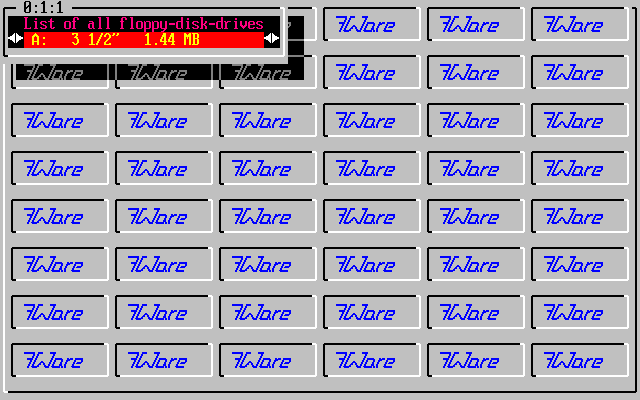
Illustration 12
We can cancel the selection of the floppydrive with ESC or take it over with ENTER. After taking over the program starts the reading process from diskette into the Extended Memory (XMS-Memory). So if you want to run 7WCopy in a DOS-Box of Windows it is extremely important that you check the option "Extended Memory (XMS)" as "Automatic".
While reading data from the diskette the program shows all important parameters and a progressbar, as you can see in Illustration 13.
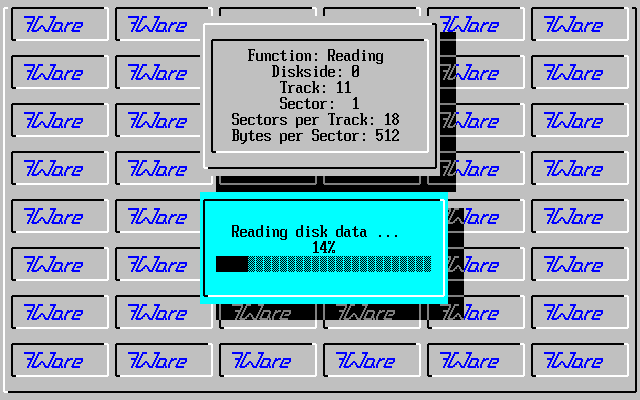
Illustration 13
After the reading process the marking bar jumps to the menuepoint "Save a disk image" (Illustration 14).
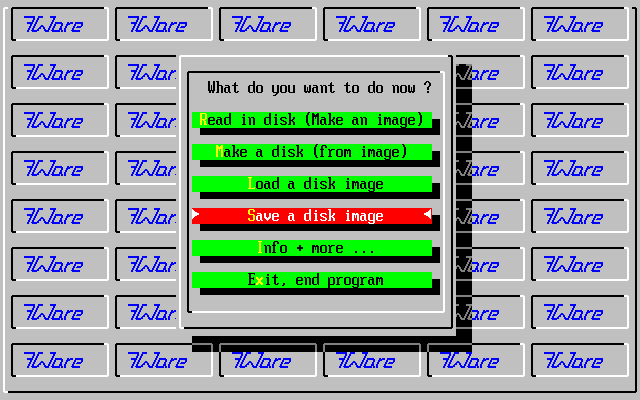
Illustration 14
To save the diskimage from Extended Memory to a hard- or LAN-drive, we press ENTER. On the screen appears a red inputmask, in which we can insert a maximal 80 chars long comment for the image (Illustration 15). This comment is very important because the filename of an image can be only max. 8 chars long. So it's hard to draw a conclusion from the filename to the wanted image. By the way, the comment will be saved in the imagefile.
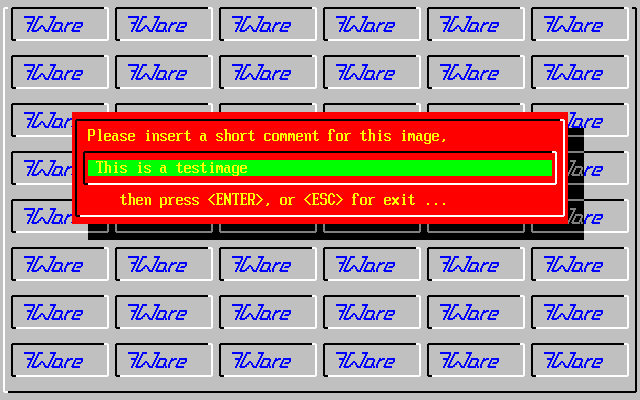
Illustration 15
After we wrote the comment we press ENTER. On the screen appears an input mask, in which we have to write a filename for this image (Illustration 16). The filename must contain 1 character at least and 8 characters for maximum. The fileextension is ".7WI". I recommend, that you name the file like a running number with leading zeros like "00000999", or you name the file with a two-digit number of the actual year, then a two-digit number of the actual month, then a two-digit number of the actual day, then a two-digit running number for the date, on which you saved the image. So if the date is the 11th July 2003, the first filename would be "03071100", the next filenames would be "03071101", "03071102" etc.
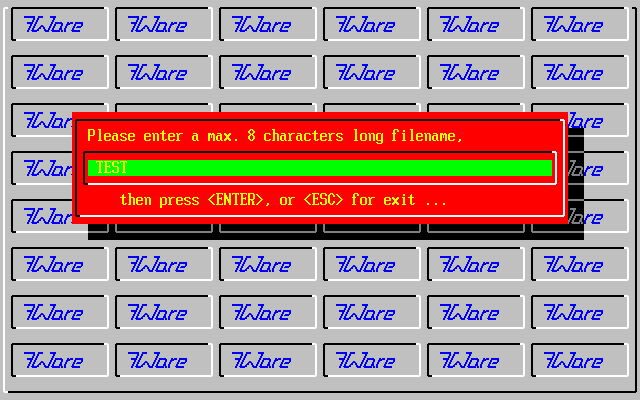
Illustration 16
After input the filename we press ENTER. The program checks if an image with this name does already exist. If so, it displays a warning (Illustration 17).
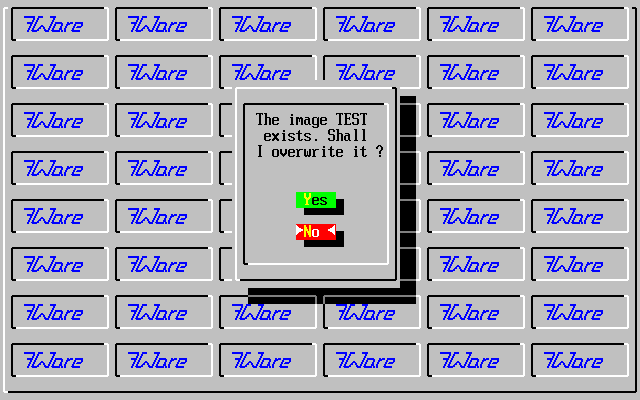
Illustration 17
If no warning appears or if it does and we press YES, on the screen appears another input mask, in which we can input a password for the image. or we leave the input line empty if we don't want to scramble the image (Illustration 18). If you input a password, please notice it and save it to a sure place. If you loose it, the image cannot be used anymore.
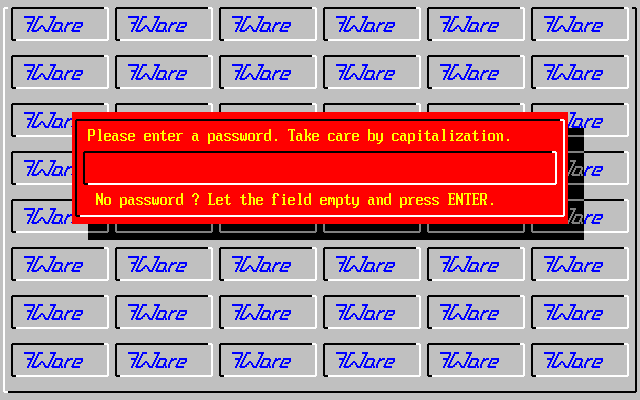
Illustration 18
Now we press ENTER. 7WCopy compresses the image and save it to the actual output path, displaying a progress bar, like shown in Illustration 19.
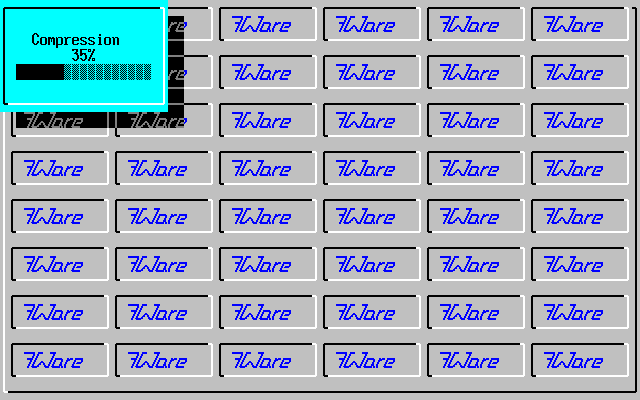
Illustration 19
After this 7WCopy returns to the main menue, highlighting the menuepoint "Read in Disk (Make an image)".
Now I want to show you how to load an image in the Extended Memory and then weite it to a floppy disk. Therefor we highlight the menuepoint "Load a disk image" and then press ENTER (Illustration 20).
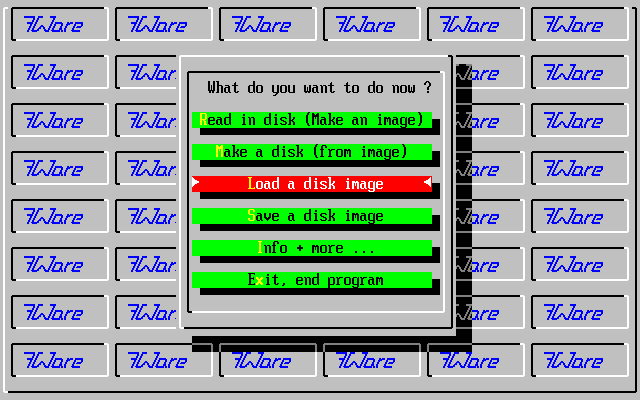
Illustration 20
Es erscheint eine Hilfs-Meldung, die darauf hinweist, daß man anschließend eine Auswahl aus den aufgelisteten Imagedateien mit der Leertaste treffen kann. Das heißt, es werden, aber nur bei unverschlüsselten Imagedateien, die Kommentare in einer Liste angezeigt. Aber hier erstmal ein Screenshot mit der Hilfs-Meldung ...
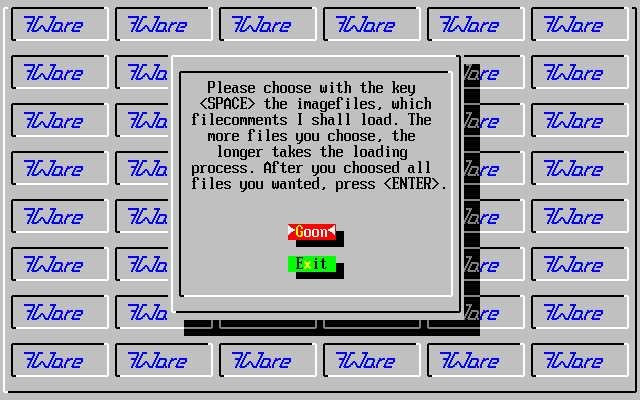
Illustration 21
Wir gehen nun weiter, indem wir "Weiter" mit ENTER bestätigen.
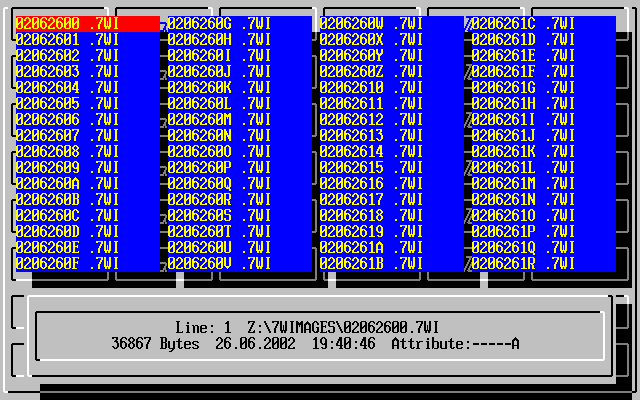
Illustration 22
7WCopy listet nun alle gespeicherten Diskettenimagedateien auf. Wir gehen mit der Taste "Bild nach unten" auf die letzte Seite der Auflistung, und kreuzen einige Dateien mit der Leertaste an, wie in der Abbildung zu sehen ...
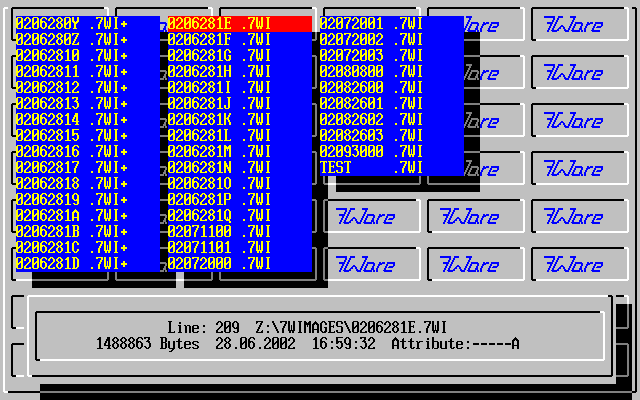
Illustration 23
Nach dem Ankreuzen (auf der rechten Seite des Dateinamens erscheint ein Pluszeichen) drücken wir ENTER. Es erscheint eine Liste mit den Kommentaren der ausgewählten Diskettenimagedateien.
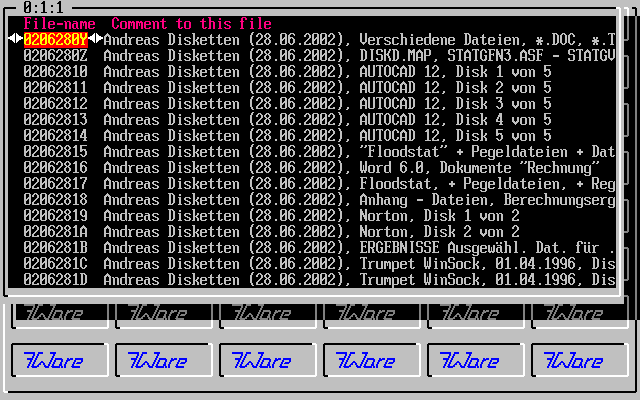
Illustration 24
Diese Kommentarliste ist auf der rechten Seite abgeschnitten, doch man kann auch diesen Teil einsehen, indem man die Liste mit der Taste CURSOR RECHTS (Pfeil rechts) nach links verschiebt, wie in der Abbildung zu sehen.
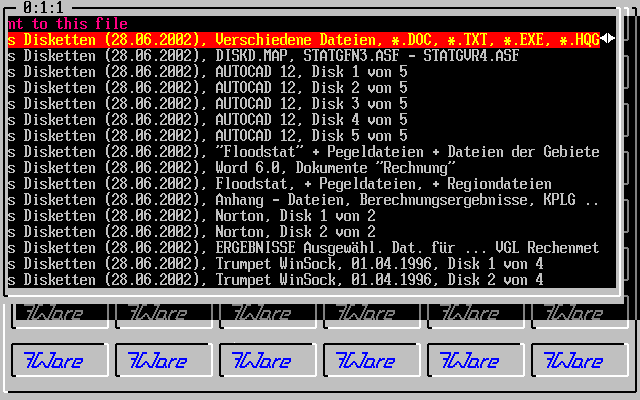
Illustration 25
Nun wählen wir ein Image aus der Liste aus und übernehmen die Auswahl mit ENTER. Die Datei wird nun von der Festplatte geladen und dabei dekomprimiert, wie in der Abbildung zu sehen.
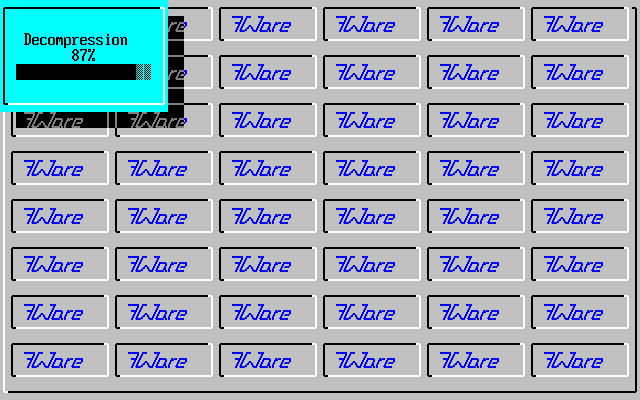
Illustration 26
Nun befindest sich das Image im erweiterten Speicher und kann auf eine Diskette übertragen werden. Zu diesem Zweck springt der Auswahlbalken, in der Annahme, daß wenn wir ein Image in den Speicher laden, daß wir dies zu dem Zweck tun, ein Image auf eine Diskette zu übertragen.
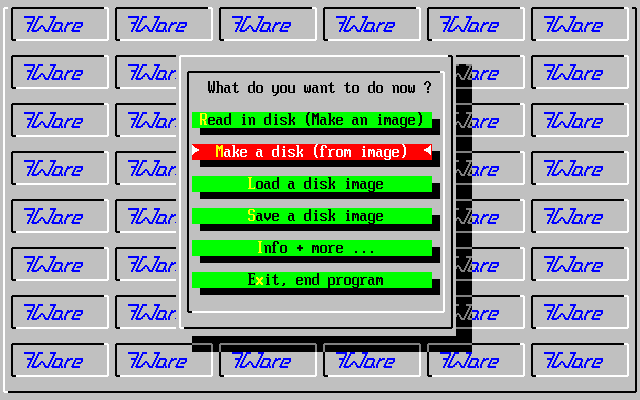
Illustration 27
Wir legen nun eine Diskette (die natürlich ein passendes Format aufweisen muß, ansonsten kommt eine Fehlermeldung) in das gewünschte Laufwerk und drücken ENTER. Es erscheint wieder die Liste mit den vorhandenen Diskettenlaufwerken.
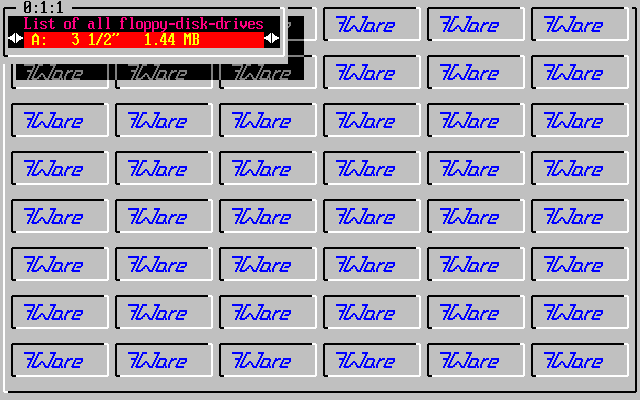
Illustration 28
Wir bestätigen und übernehmen die Laufwerksauswahl mit ENTER. 7WCopy überprüft die Diskette im Laufwerk auf ihr richtiges Format und gibt anschließend eine Warnmeldung aus.
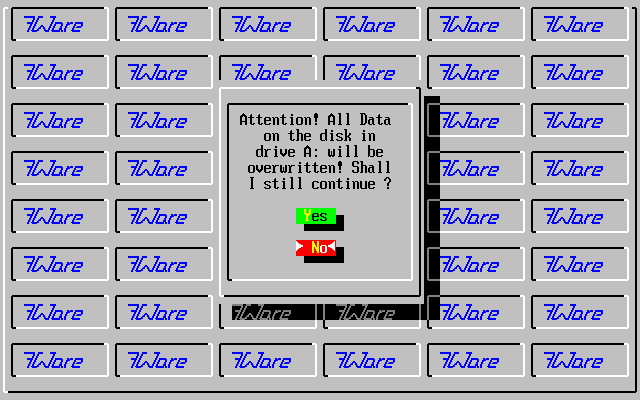
Illustration 29
Wir wählen JA und drücken ENTER. Nun wird das Image im Speicher spurweise auf die Diskette übertragen. Dabei gibt das Programm auch noch eine Fortschrittsanzeige aus, wie auf dem Screenshot zu sehen.
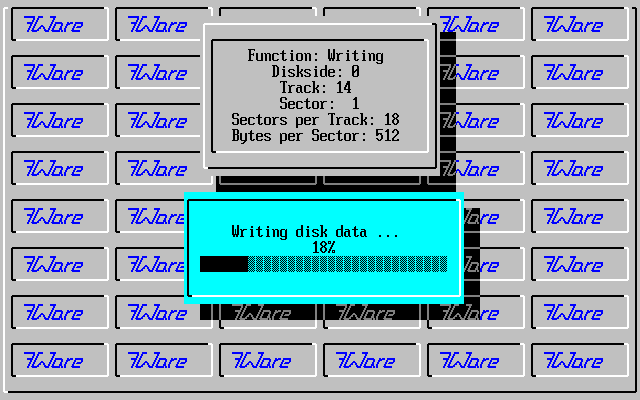
Illustration 30
Ich denke, nun möchten Sie dieses kleine, aber feine - und vor allem kostenlose - Programm selber einmal ausprobieren. Ich wünsche Ihnen dabei viel Spaß.
 Attention:
If you use 7WCopy, you do it by your own risk! This program was developed with
care and was used and testet for a long time on different systems, but I cannot
guarantee, that it works correctly every time and on every PC. If you don't
accept this, it is not allowed for you, to download it and/or to use it.
If you accept, click here for downloading 7WCOPY_E.ZIP (106,7 KB)
Installationshinweis: Entpacken Sie 7WCopy in ein Verzeichnis Ihrer Wahl und starten Sie es mit der Befehlszeile ...
Laufwerk:\Verzeichnispfad\7WCOPY.EXE